
Tags
Born Pretty Store, Color Club, freehand, metallic nail foils, Nail Art, Pop Beauty, sugar-spun, Wet n Wild
Provided for review. All opinions are my own.
I have another (Born Pretty Store) review for you today but for a completely different product. I saw a Youtube video a long long time ago featuring nail foils. I could not decide whether I liked the idea or not. On one hand, it is VERY RA-friendly. On the other hand, the final nail art looks kind of messy and unintentional. I know, I know, sounds strange coming from the girl who loves abstract nail art! I do not really know how to explain it, but something about foil nail art does not look right.
I was always curious so I thought this was the perfect time to try them! BPS has a huge selection, something like 27 colors, of these (nail art) foil papers so there is something for everyone…as long as you like metallics, of course!
I hope you find this review helpful!
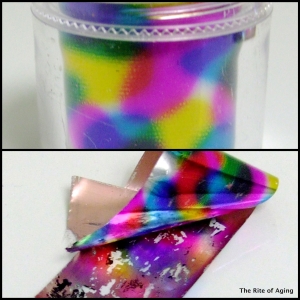
Nail Foil #27
The above picture also links to the product’s webpage.
The foil comes in a plastic tub with a screw-off lid. The product measures about 44 inches, which I was really surprised about because I did not read the product description, as per usual. When I first saw the product I thought it was only the diameter of the jar so I was very happy when I realized how much there actually was!
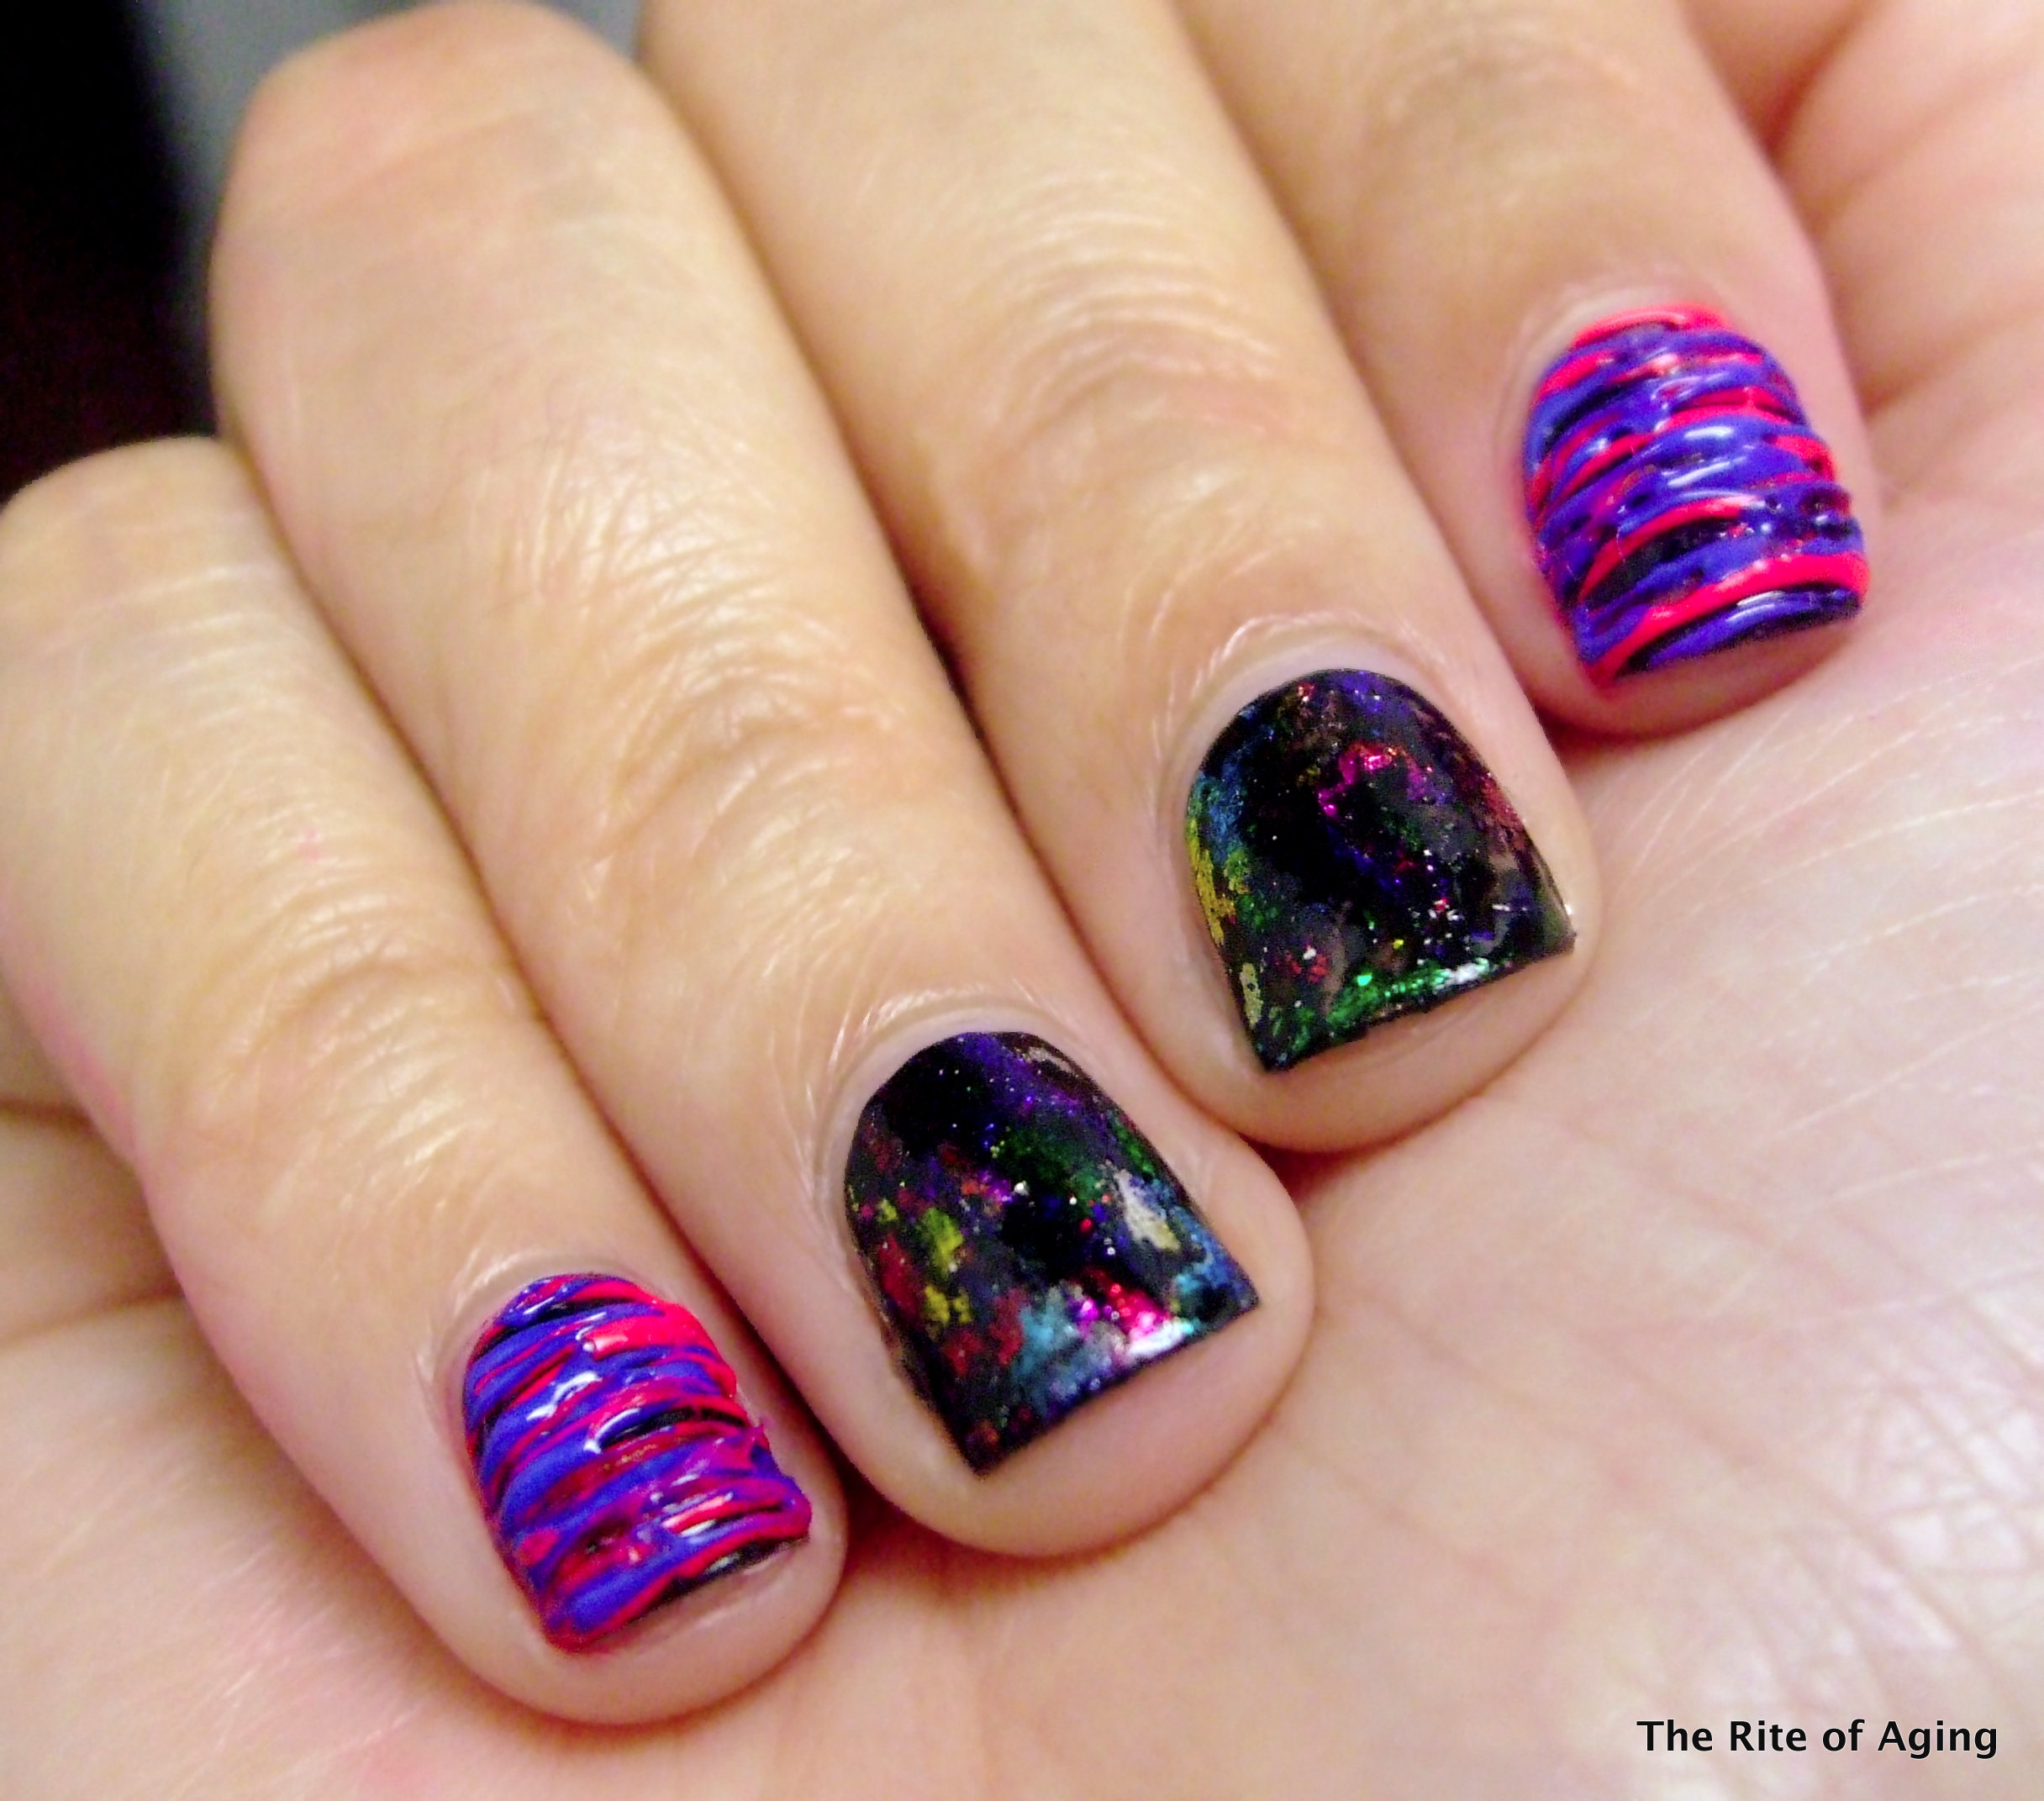
For this look:
I used 2 coats of Wet n Wild Black Creme as my base.
I used Color Club Warhol and Pop Beauty Pacific Hoot for the sugar-spun.
Application and Thoughts:
Wait until the last coat of polish is slightly dry and tacky. Gently apply the foil over the nail with the color face up. Quickly lift the foil off the nail.
I watched a couple of videos where people were able to apply the foil to the entire nail and pull it off. However, when I used this method, I also removed the polish. I had more luck applying the foil to smaller areas instead.
The foil was very easy to use. I did experience a great deal of trial and error figuring out how tacky and dry the polish had to be and ended up with bald spots. I just re-applied the nail polish and foil. The polish had to be on the drier side of tacky so this technique worked well for me.
The used spots of the paper became clear so it was easy to not re-use spots.
 While this was a very easy and quick nail art technique parts of it were tedious. It took multiple attempts to build up the color and it was difficult to foil the edges of the nail. Regardless, it was not time-consuming so I did not mind the extra work. I think with a little practice I will not have to “re-touch” as much.
I recommend the foils unless you are not a fan of abstract nail art since there is no way to get a structured look with these. As I worked with these I think I realized why I did not like them at first. I do not like the look of bigger chunks. I much rather like the look of the smaller particles that mimic a flakies top coat! I guess that is personal preference, though. What do you think? Have you tried these foils? Which look do you prefer?
One jar of foil (or ~44 inches) retails for $1.50 at the Born Pretty Store website.
If you decide to place an order do not forget to apply my discount code below!

Hi, my name is Monica and I have RA.

I love this look, but I love abstracts anyway. If you want full-nail coverage or even just more control over where the foil goes without worrying about pulling up your base color, I recommend foil adhesive glue. I know the dollarnailart store has a good one – I use it for my foils, and it works really well. I think BPS also has an adhesive glue but don’t quote me on it. IIRC Robin Moses recommends a craft glue – The Best Glue Ever? Not sure on the name. I can research it more if you need me to, but either way it will help ease some of your frustrations with using a tacky polish layer.
LikeLike
Oh, cool! I’ve heard of nail adhesive glue but how does it work with foil? Do you apply it like nail polish then apply the foil? Thank you so much for the help..I will try and Google it for more information and get back to you 🙂
LikeLike
Yes exactly. You apply it with a brush in a thin layer and it looks bluish while wet. You let it dry until it turns clear and then apply the foil. If you search youtube videos for “nail foil” you should come across a tutorial really quickly.
LikeLike
Awesome, thank you Ali!!
LikeLike
Okay, so here’s the glue Robin Moses uses, although sometimes she uses the stuff from dollarnailart as well. http://scraperfect.com/products-2/best-glue-ever/
Application is the same either way. Wait a couple minutes til it turns clear, then apply the foil/glitter/etc.
LikeLike
Awesome, thank you so so much Ali!! I’ll check it out!
LikeLike
In the tutorials and other instructions I’ve seen for using these foils, it says to cut off a piece of the foil to the size you want to use. This would save a lot of waste, and would also make it much easier to manipulate, I think. Anyway, great job. Love the colours.
LikeLike
Oh! I thought about that but if I wanted to re-use the pieces they’d be difficult to keep flat and track of…but I’ll try that to see if I get more color in the first try! Thanks!
LikeLike
You’re welcome, Moncia. Glad to be of help, and I really do love your designs and tutorials.
LikeLike
Thank you so much! 🙂
LikeLike